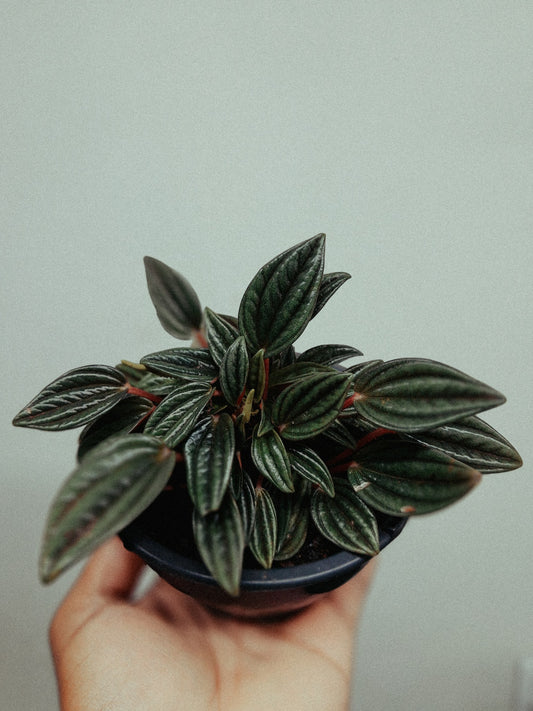
What is A Rhaphidophora Tetrasperma or Mini Monstera plant?
The Mini Monstera, scientifically known as Rhaphidophora Tetrasperma, has gained considerable popularity in recent years among houseplant enthusiasts and interior decorators alike. This captivating tropical plant, native to the rainforests of Southeast Asia, boasts stunning foliage that closely resembles the highly sought-after Monstera Deliciosa. However, as its nickname suggests, the Mini Monstera is a smaller and more manageable version, making it an ideal choice for those looking to bring a touch of the tropics into their homes without the need for extensive space.
Although not a true Monstera species, the Mini Monstera's striking appearance, with its split and perforated leaves, sets it apart from other houseplants. In addition to its aesthetic appeal, Rhaphidophora Tetrasperma is also relatively low maintenance, making it an excellent option for both experienced plant enthusiasts and novices alike.
In this comprehensive care guide, we'll delve into the various aspects of Mini Monstera care, covering topics such as plant characteristics, optimal growing conditions, maintenance tips, and propagation techniques. By the end of this guide, you'll be well-equipped with the knowledge and confidence needed to successfully cultivate and care for your own Mini Monstera, ensuring it remains a lush and thriving centerpiece in your indoor living space.
Why is it called Mini Monstera?
It is called Mini Monstera because its leaves closely resemble the popular Monstera Deliciosa plant but are smaller in size.
The fenestrations or splits in the leaves give it a unique and appealing aesthetic, making it a popular choice for indoor plants among plant enthusiasts.
Rhaphidophora Tetrasperma Plant Characteristics
Growth Pattern
Mini Monstera is a fast-growing plant, with vines that can reach several feet in length. In its natural habitat, it is a climbing plant that uses aerial roots to attach itself to trees or other structures for support.
As a houseplant, it will need a support structure, such as a moss pole or trellis, to encourage vertical growth.
Leaves

The leaves of the Mini Monstera are heart-shaped and have distinct fenestrations, which increase in number as the plant matures.
The leaves are typically dark green and glossy, with a leathery texture.
Stems
The stems of Rhaphidophora Tetrasperma are slender and flexible, with nodes spaced evenly along the length of the stem.
Aerial roots grow from these nodes, helping the plant to climb and absorb moisture and nutrients.
Optimal Growing Conditions for a Rhaphidophora Tetrasperma
Light Requirements
Mini Monstera thrives in bright, indirect light. It can tolerate lower light levels than direct sun, but growth may be slower, and the leaves may not develop the characteristic fenestrations.
Direct sunlight can scorch the leaves, so it's essential to avoid exposing sensitive roots of the plant to harsh light.
Temperature and Humidity
Rhaphidophora Tetrasperma prefers warm temperatures between 65°F and 85°F (18°C to 29°C) and high humidity levels, similar to its natural tropical environment.
Keep the plant away from cold drafts, heating vents, or air conditioners, as fluctuating temperatures can stress the plant.
To maintain humidity, you can place the plant on a tray filled with water and pebbles, use a humidifier, or group it with other humidity-loving tropical plants together.
Soil
A well-draining, peat-based potting mix is ideal for the Mini Monstera. You can create a suitable potting soil mix by combining equal parts peat moss, perlite, and orchid or pine bark together.
This combination ensures good aeration and prevents the roots from becoming waterlogged.
Watering
Water your Mini Monstera when the top 1-2 inches of soil feels dry to the touch. It's essential not to overwater, as this can lead to root rot.
During the growing season, you may need to water more frequently, while in the winter months, you can reduce the frequency.
Keep in mind that the plant's watering needs may vary depending on factors like humidity, temperature, and light levels.
Mini Monstera - Rhaphidophora Tetrasperma Care
Pruning
Regular pruning helps to maintain the shape and size of your Mini Monstera, encourages bushier growth, and keeps the plant healthy.
Remove any yellowing or damaged leaves, and trim back overgrown vines as needed. Always use clean, sharp pruning shears to prevent the spread of disease.
Repotting
Repot your your Rhaphidophora Tetrasperma plant every 1-2 years or when the roots begin to outgrow the current pot.
Choose a container that is 1-2 inches larger in diameter than the current pot and ensure it has drainage holes. Gently remove the plant from its existing pot, shake off any excess soil, and place it in the new container, filling it with fresh potting mix.
Pest Control
Common Pests
The Mini Monstera may occasionally suffer from common houseplant pests such as spider mites, mealybugs, and aphids. Regularly inspect the plant for signs of infestation, and treat any issues promptly.
A combination of neem oil, insecticidal soap, or rubbing alcohol can be used to control pests. Be sure to isolate the affected plant from other houseplants to prevent the spread of pests.
Propagation Techniques
There are several methods for propagating Mini Monsteras, with stem cuttings being the most popular. Let's take a look at the various options.
Stem Cuttings
Using stem cuttings is the most common way to propagate Mini Monsteras. You can either root the cuttings in water or directly in soil.
Water Propagation
- Take a stem cutting with at least two nodes (the points where leaves emerge from the stem).
- Remove the lower leaves, leaving only one or two at the top.
- Place the cutting in a container with water, ensuring the nodes are submerged.
- Keep the container in a warm, well-lit area, but avoid direct sunlight.
- Change the water every few days to prevent bacterial growth.
- Wait for roots to grow, which can take two to four weeks.
Soil Propagation
- Follow the same steps as for water propagation, up to step 3.
- Instead of placing the cutting in water, plant it in a well-draining potting mix.
- Keep the soil consistently moist, but not soggy.
- Place the cutting in a warm, well-lit area, but avoid direct sunlight.
- Expect roots to form within two to four weeks.
Air Layering
This method involves inducing root growth on a still-attached stem before detaching it to create a new plant.
To air layer your Mini Monstera: Identify a healthy stem with at least two nodes. Make a shallow cut on the stem, halfway between the two nodes. Wrap damp sphagnum moss around the cut, covering it completely. Cover the moss with plastic wrap, securing it with twist ties or rubber bands. Wait for roots to grow, which can take several weeks. Once roots have formed, cut the stem below the new roots and plant the cutting in a well-draining potting mix.
Step-by-Step Propagation Guide
-
Choosing the Right Cutting
Select a healthy, mature stem with at least two nodes (the points where leaves emerge from the stem) and a few leaves. Look for a stem that is free from pests and diseases, and avoid choosing cuttings from weak or yellowing stems. The ideal cutting should be about 4-6 inches in length. -
Preparing the Cutting
Using a clean, sharp pair of pruning shears or scissors, cut the stem at a 45-degree angle just below the second node. This angled cut helps increase the surface area for water and nutrient absorption. Remove the lower leaves from the cutting, leaving only one or two at the top. This reduces the amount of water loss through transpiration, allowing the cutting to focus its energy on root development. -
Rooting the Cutting
Choose the preferred method for rooting your Mini Monstera cutting: water propagation, soil propagation, or air layering. Each method has its own benefits and drawbacks, so choose the one that best suits your needs and preferences.
- Water propagation allows you to monitor root development more easily, but may require a transition period when planting in soil.
- Soil propagation involves planting the cutting directly in soil, which can reduce stress during the transition to its permanent home, but it may be harder to monitor root growth.
- Air layering is an alternative method that encourages root growth on a still-attached stem, but it can be more complex and time-consuming than the other methods.
-
Planting the Cutting
Once the cutting has developed a healthy root system, it is time to plant it in a well-draining potting mix. Choose a pot with drainage holes to prevent waterlogging and root rot. Fill the pot with a mix of peat or coco coir, perlite, and orchid bark for optimal drainage and aeration. Create a hole in the soil deep enough to accommodate the roots, and carefully place the cutting in the hole. Gently backfill the hole with soil, ensuring that the roots are fully covered and the stem is stable. -
Caring for Your New Plant
After planting, provide your new Mini Monstera with the proper care to help it thrive:
- Water: Keep the soil consistently moist, but not soggy. Water when the top inch of soil feels dry to the touch. Be cautious not to overwater, as this can lead to root rot.
- Light: Place your Mini Monstera in a spot with bright, indirect light. Direct sunlight can scorch the leaves, while insufficient light can lead to leggy growth and smaller leaves.
- Temperature: Maintain a temperature between 65-85°F (18-29°C) for optimal growth. Avoid placing your plant near drafts or air conditioning vents, as sudden temperature fluctuations can stress the plant.
- Humidity: Mini Monsteras prefer high humidity levels, around 60-80%. To increase humidity, use a humidifier, place a tray of water near the plant, or group it with other humidity-loving plants.
- Fertilization: Fertilize your Mini Monstera monthly during the growing season (spring and summer) using a balanced liquid houseplant fertilizer, diluted to half-strength. During the dormant season (fall and winter), reduce fertilization to once every two months.
Conclusion
The Mini Monstera (Rhaphidophora Tetrasperma) is a beautiful and relatively easy-to-care-for tropical plant that makes a great addition to any indoor space.
With the proper care and attention to light, temperature, humidity, and watering needs, your Mini.
Monstera plant will thrive and become an eye-catching focal point in your home.
FAQs
-
Is Mini Monstera toxic to pets?
Although the Mini Monstera is not considered as toxic as some other houseplants, it can still cause irritation and discomfort if ingested by pets.
It's best to keep the plant out of reach of cats, dogs, and other curious animals to prevent any issues.
-
Why are my Mini Monstera's leaves turning yellow?
Yellowing leaves can be a sign of several issues, including overwatering, underwatering, insufficient light, or nutrient deficiencies.
Check the plant's environment and care routine to determine the cause and make any necessary adjustments.
-
How often should I fertilize my Mini Monstera?
During the growing season (spring and summer), fertilize your Mini Monstera every 4-6 weeks with a balanced, water-soluble houseplant fertilizer, diluted to half the recommended strength.
In the fall and winter, reduce the frequency to once every 2-3 months.
-
Can I grow Mini Monstera outdoors?
Mini Monstera plants can be grown outdoors in USDA hardiness zones 10 and above, where temperatures do not drop below 40°F (4°C).
If you live in a cooler climate, you can grow the plant outdoors during the warmer months and bring it inside when temperatures drop.
-
Why are the leaves on my Mini Monstera not splitting?
The lack of fenestrations or splits in the leaves of your Mini Monstera can be attributed to insufficient light, immaturity of the plant, or a combination of both factors.
Ensure that your mini monstera plant receives adequate bright, indirect light, and be patient with your lovely plant as it matures – the characteristic splits will develop over time.


